FollowSpot Application
EOS can be used to perform automated followspot with any moving-head fixture on the market.
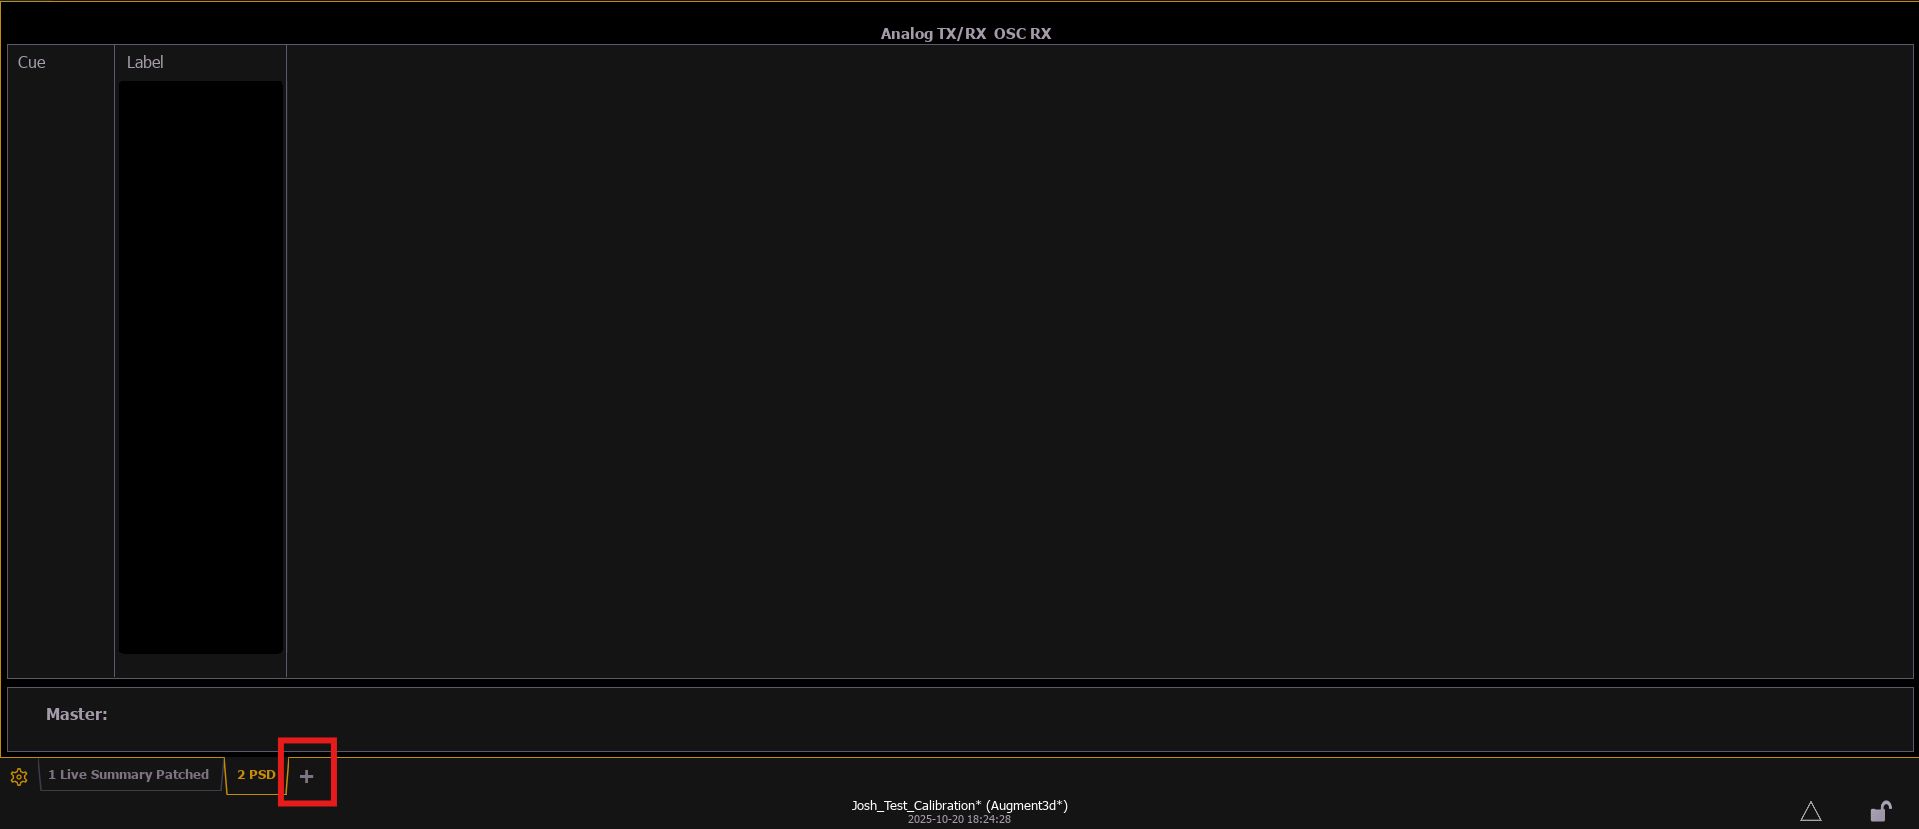
Patch SEM Trackers
SEM (Scenic Element Movable) is a type of element in EOS that allows objects to move by being assigned to it.
You will be able to send positioning values (OSC) to the SEM(s). Thanks to this, you can make a fixture follow the SEM which represents a Target in Kratos.
- To do this, patch as many SEMs as you have targets in your Kratos Show.
SEMs must have unique identification.

Patch Tracking Fixture and Check the FixtureTypes
Patch the fixtures for tracking.
After this, you must verify the fixture parameters to ensure that the manufacturer's specifications match the values entered in the patch.
Go to the Fixture menu, at the bottom right.

Select the fixture type used for tracking.
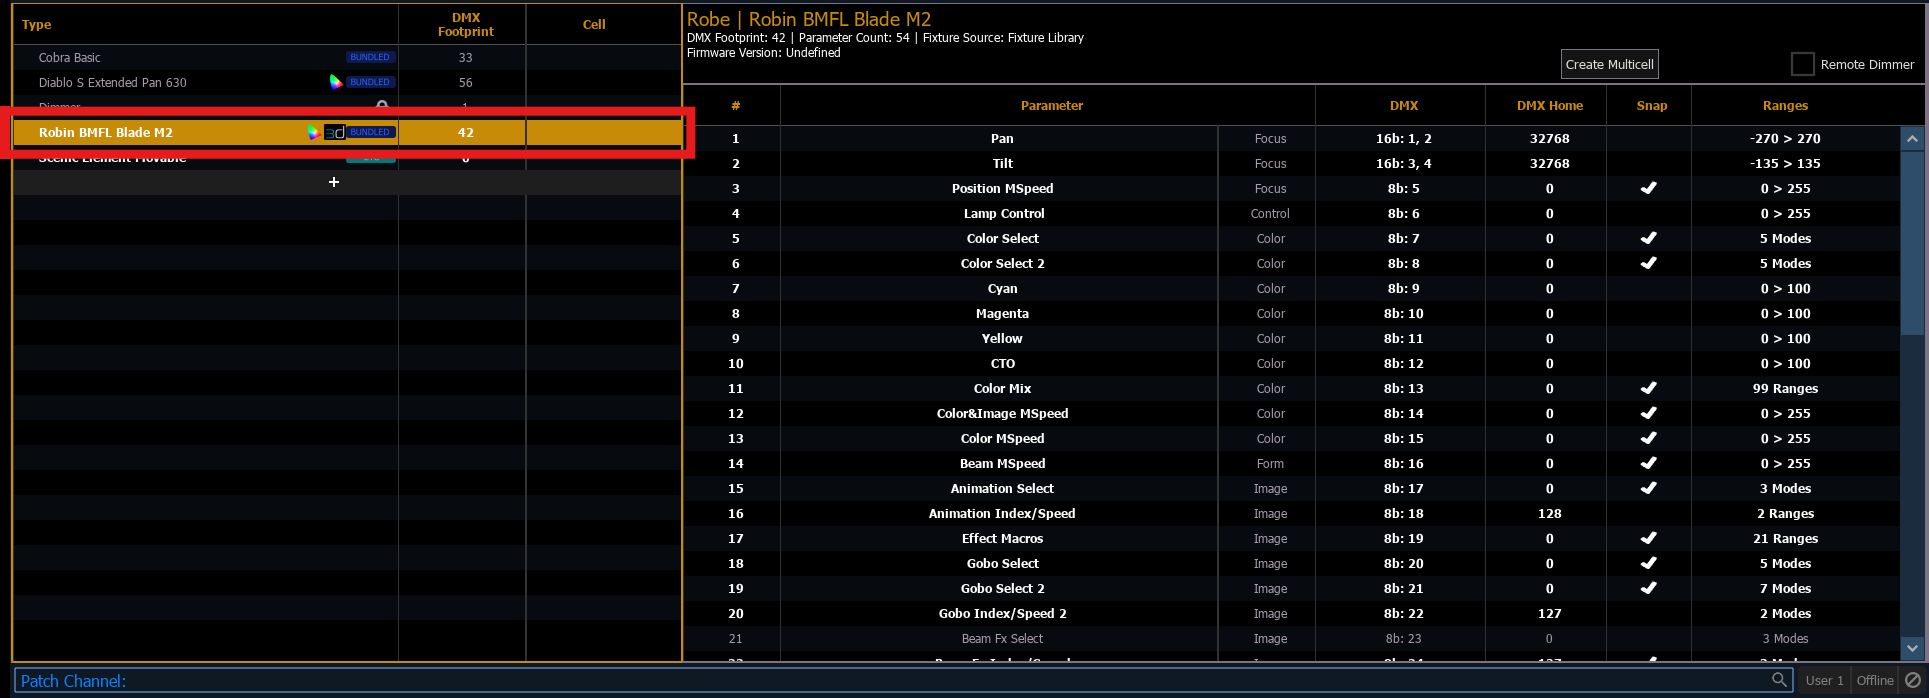
You must compare the manufacturer's documentation to determine the correct values and must correct them if needed in the fixture's FixtureTypes.
If the values are incorrect, you must modify them, as they are important for tracking accuracy. Double-click on the selected field to open the modification parameters.
Current fixture specifications:
- Pan = 540°
- Tilt = 270°
- Zoom = 5° - 55°


Assign SEM to a Focus Palette
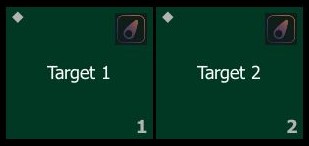
The goal is to create one Focus Palette per SEM ID. They must be assigned this way, for example:
- SEM 80 = Focus Palette 1
- SEM 81 = Focus Palette 2
Open a Focus Palette, adding a view with the small cross if not already done.
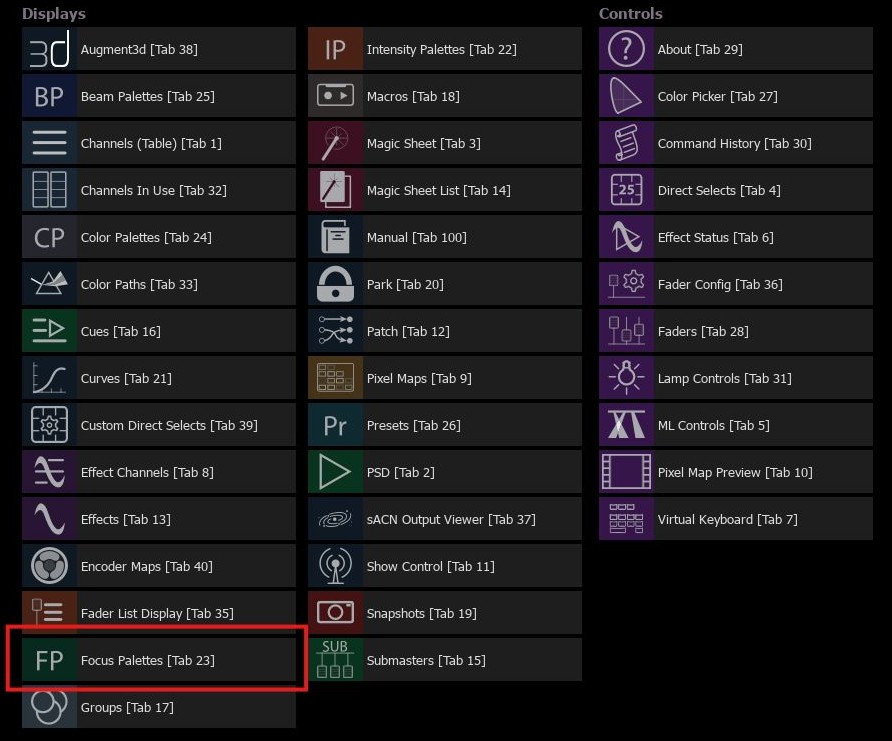
You must create empty Focus Palettes according to the number of SEMs needed. In our example, two SEMs are sufficient.

In the right column, you see the Track SEM column. You must assign the IDs of the SEMs present in the patch to reference them in the Track SEM column.

You must name the SEMs according to the Tracker names, example: Focus Palette 1 = Lead / Focus Palette 2 = Guitarist
Calibrate Fixtures Position
Augmented 3D
You must calibrate the fixtures in Augmented 3D. To do this, provide positioning values for the fixtures so they appear in Augmented 3D.
Return to the patch, then to Augmented 3D, at the bottom left.
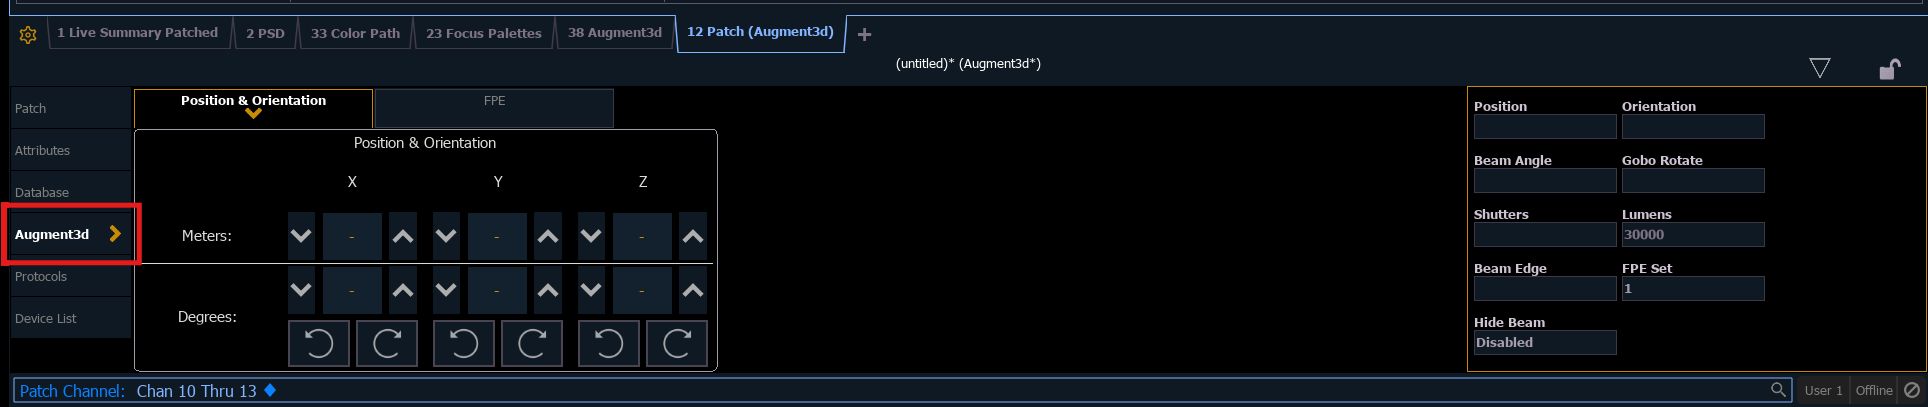
You must define initial values to display the fixtures in Augmented 3D:
- X = 0
- Y = 0
- Z = 0
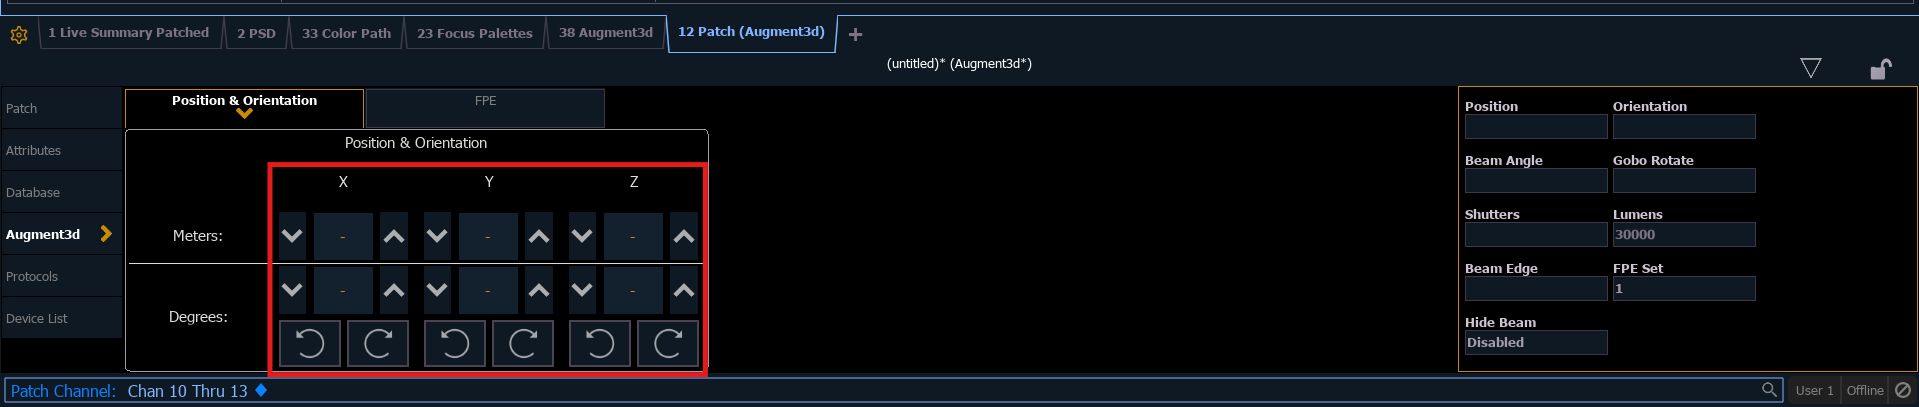
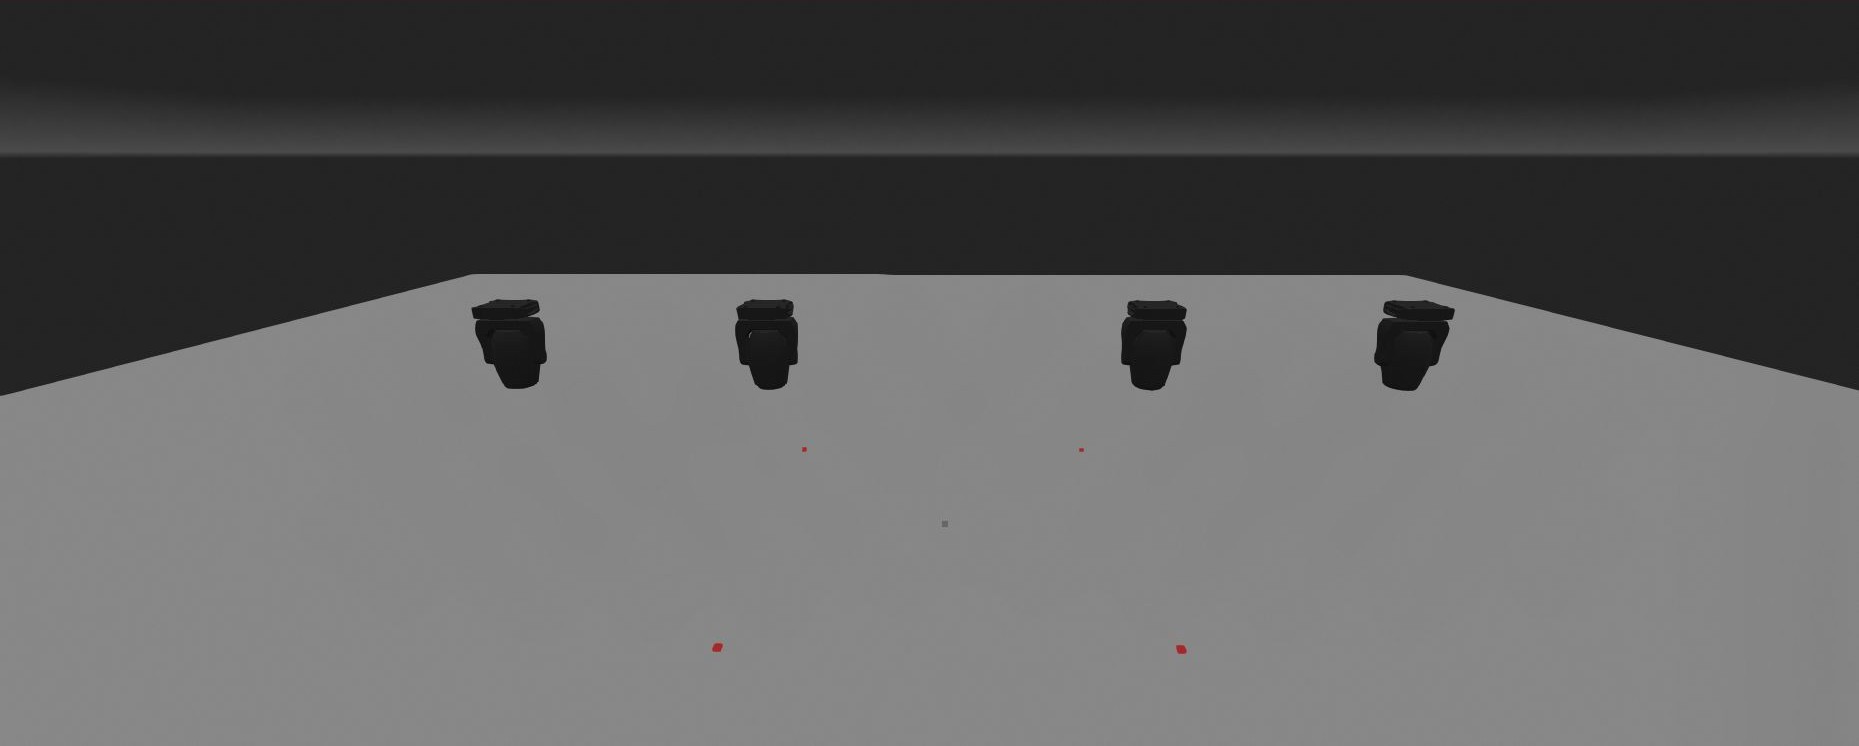
In Augmented 3D, you must place your fixtures according to your setup, for example:
- Fixture 1 X = -3.5
- Fixture 2 X = -1.5
- Fixture 3 X = 1.5
- Fixture 4 X = 3.5
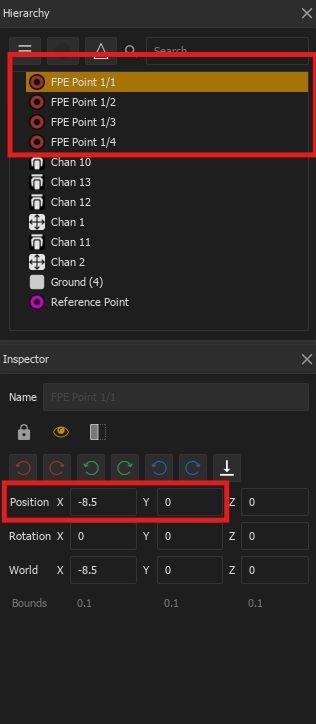
FPE (Fixture Position Estimation)
You must proceed to the calibration step using FPE (Fixture Position Estimation).
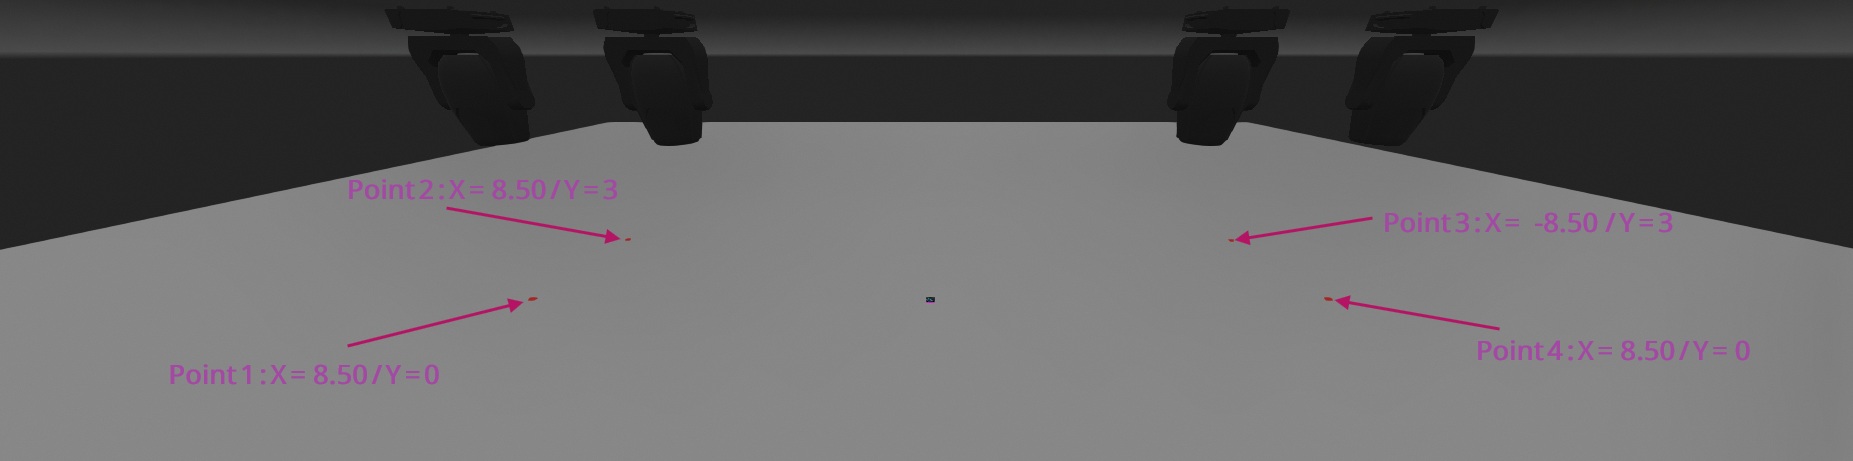
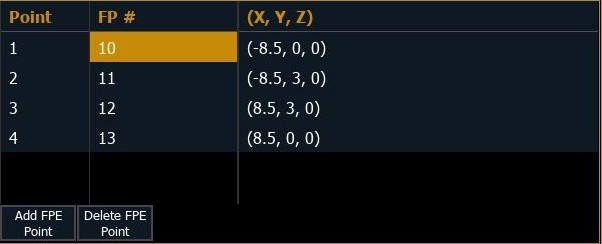
You must retrieve the values of the four calibration rectangle points. You can find these values by following this link: Calibration Point Values
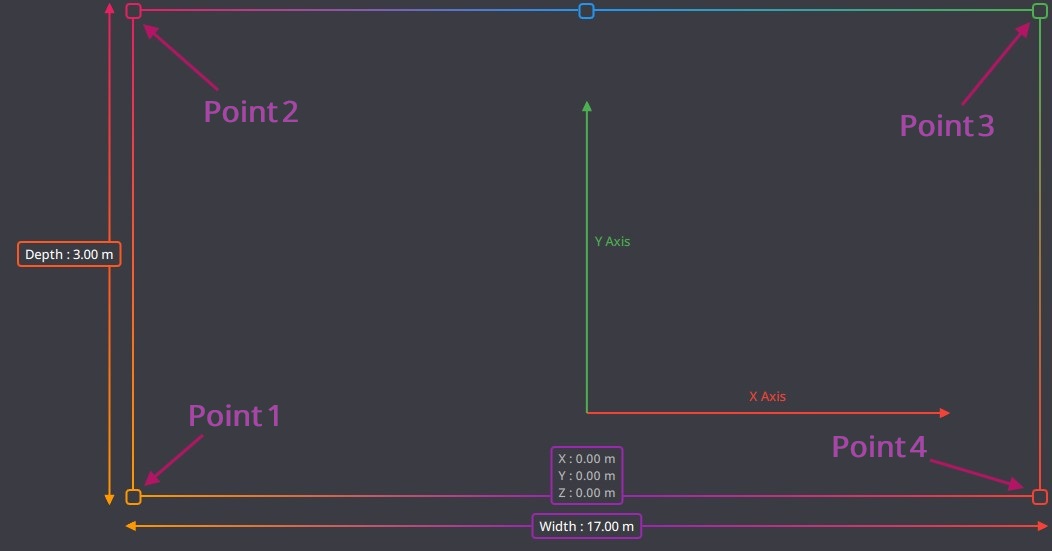
Using these values, you must add each FPE point by placing them according to their XY coordinates.
Result obtained:
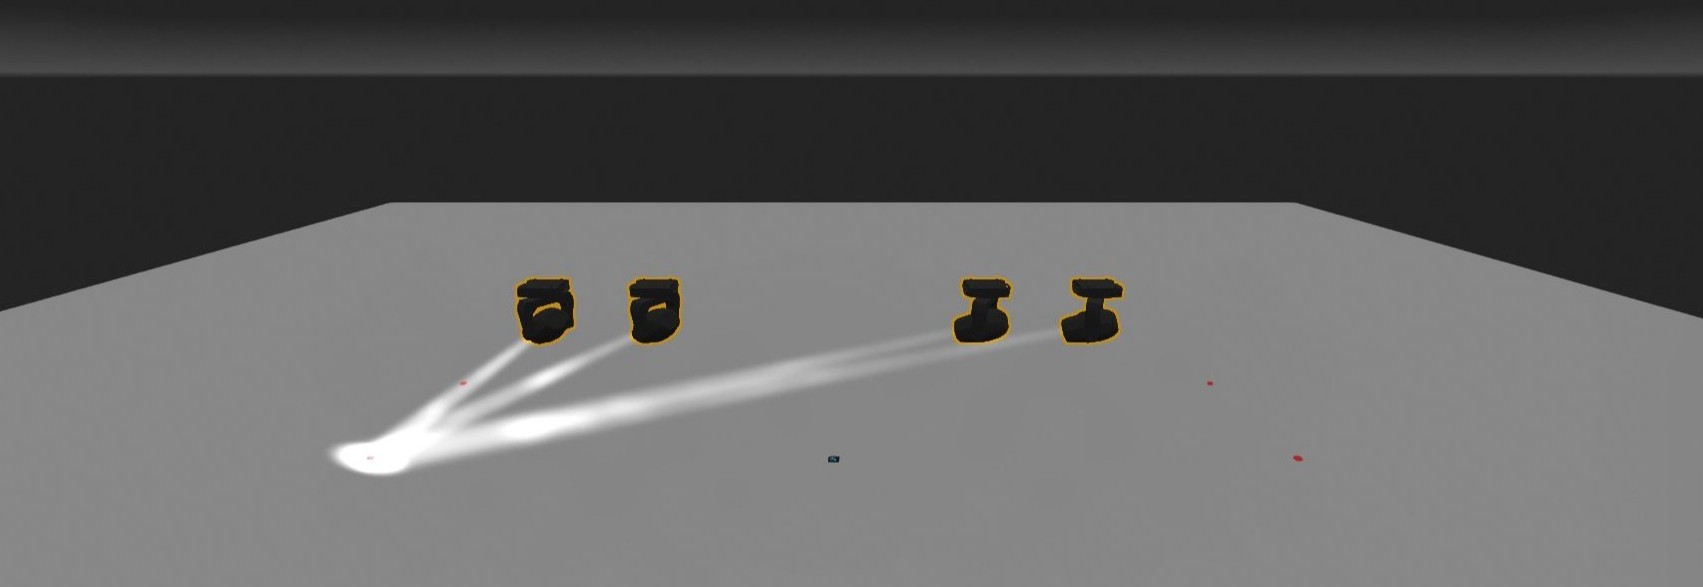
Next, you must point each fixture at the four FPE points and save each one in a Focus Palette:
- FPE 1 = Focus Palette 10
- FPE 2 = Focus Palette 11
- FPE 3 = Focus Palette 12
- FPE 4 = Focus Palette 13

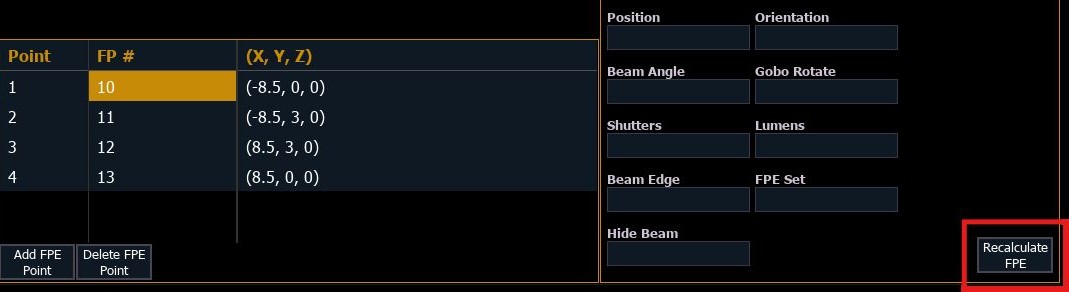
You must return to the patch to assign each Focus Palette to the corresponding FPE, which will allow calibration of the fixtures in the Augmented 3D view.
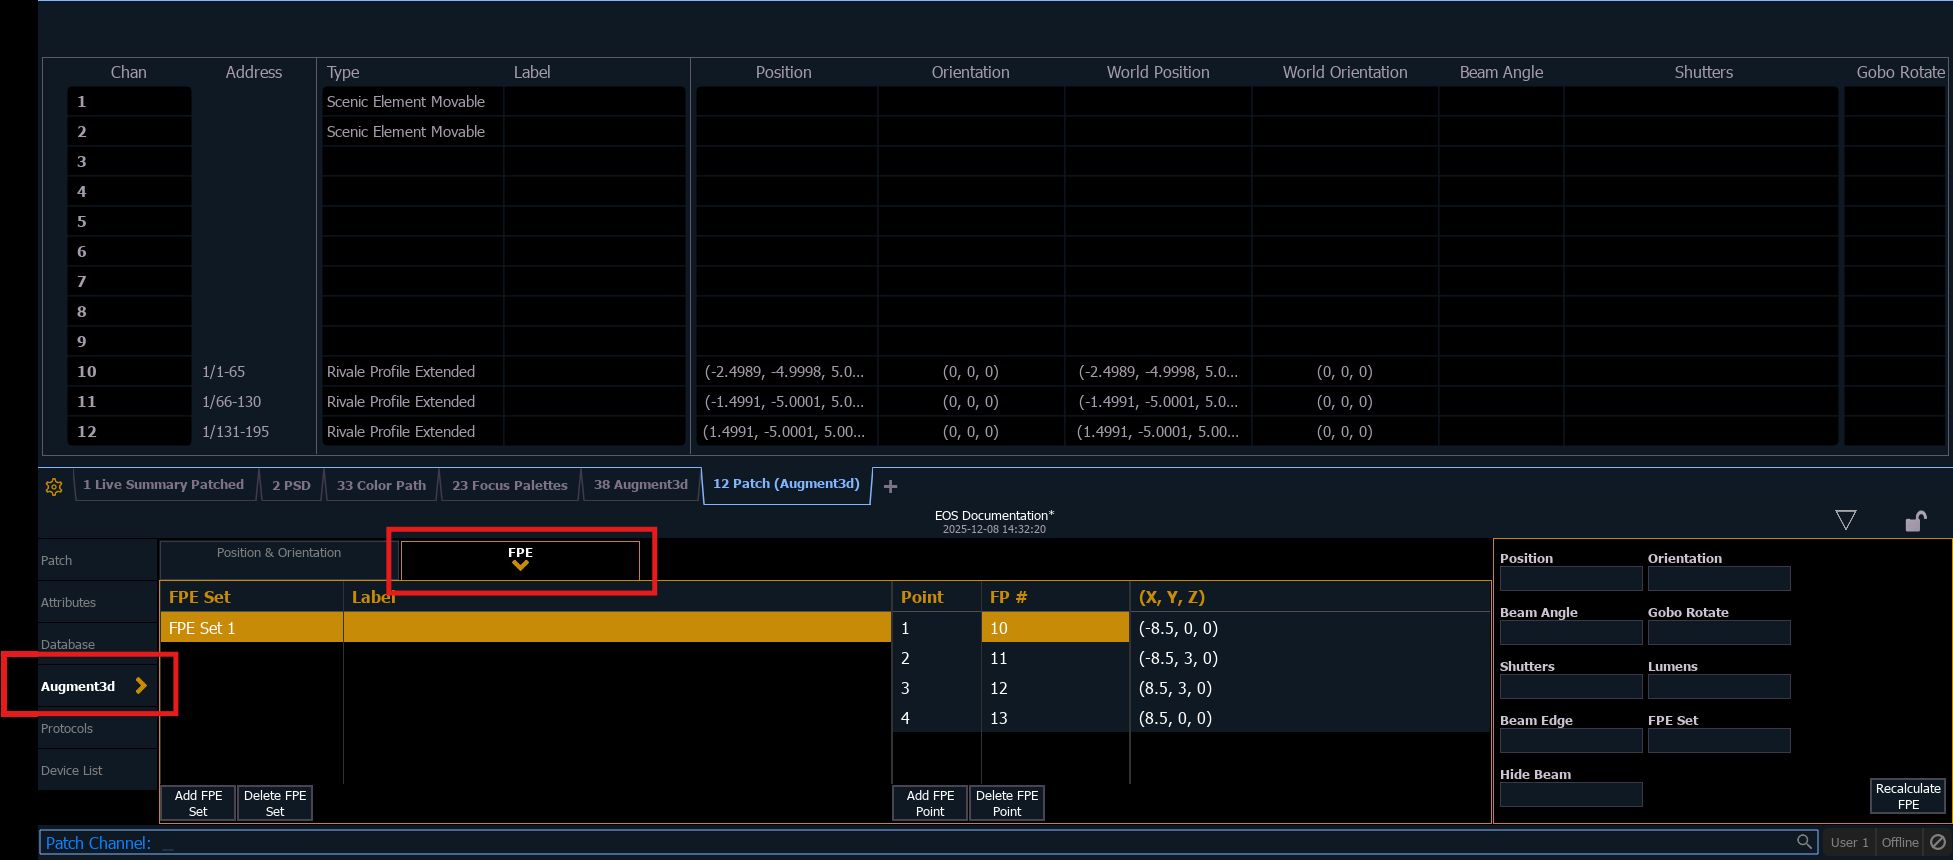
For each FPE point, you must add the assigned Focus Palette. In this example, we have Focus Palettes 10 to 13.
Finally, you must press Recalculate FPE. This will calculate the position of the luminaires based on the FPE points, to automatically place them in the 3D space.
Point a Fixture at Target
To assign a Focus Palette to a fixture, you must select the fixture(s) you want to attach to a particular SEM, then must press the corresponding Focus Palette which will make the fixture follow the Target.

You can record these values in a cue, groups, subs, palettes to keep the fixture following the target during the show.
This will produce the following result: