Followspot application
GrandMA2 can be used to perform automated followspot with any moving-head fixture of the market.
Patch Stage Markers
Stage Markers are standard fixtures in GrandMA that link the position of Targets received via PSN to the position for fixtures used to track theses Targets. To do so :
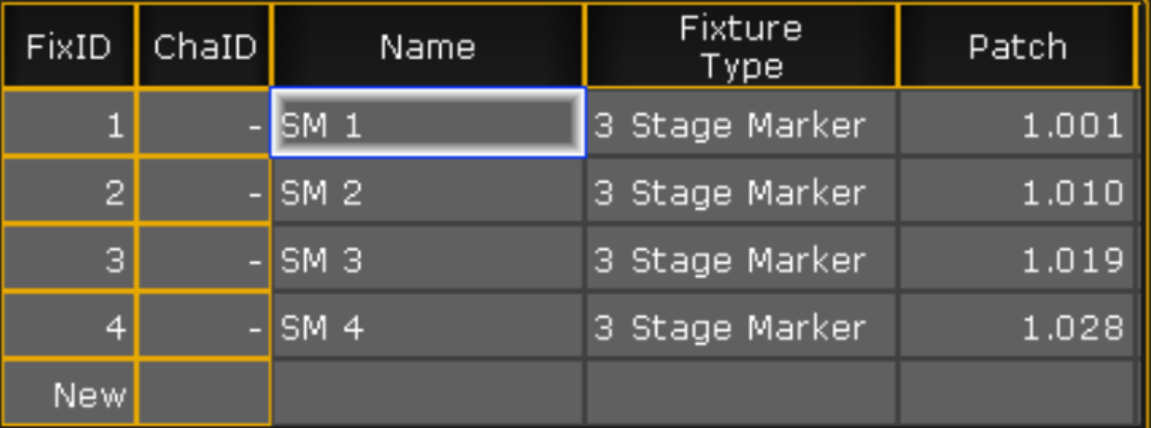
- Patch as many Stage Marker as people you need to track.
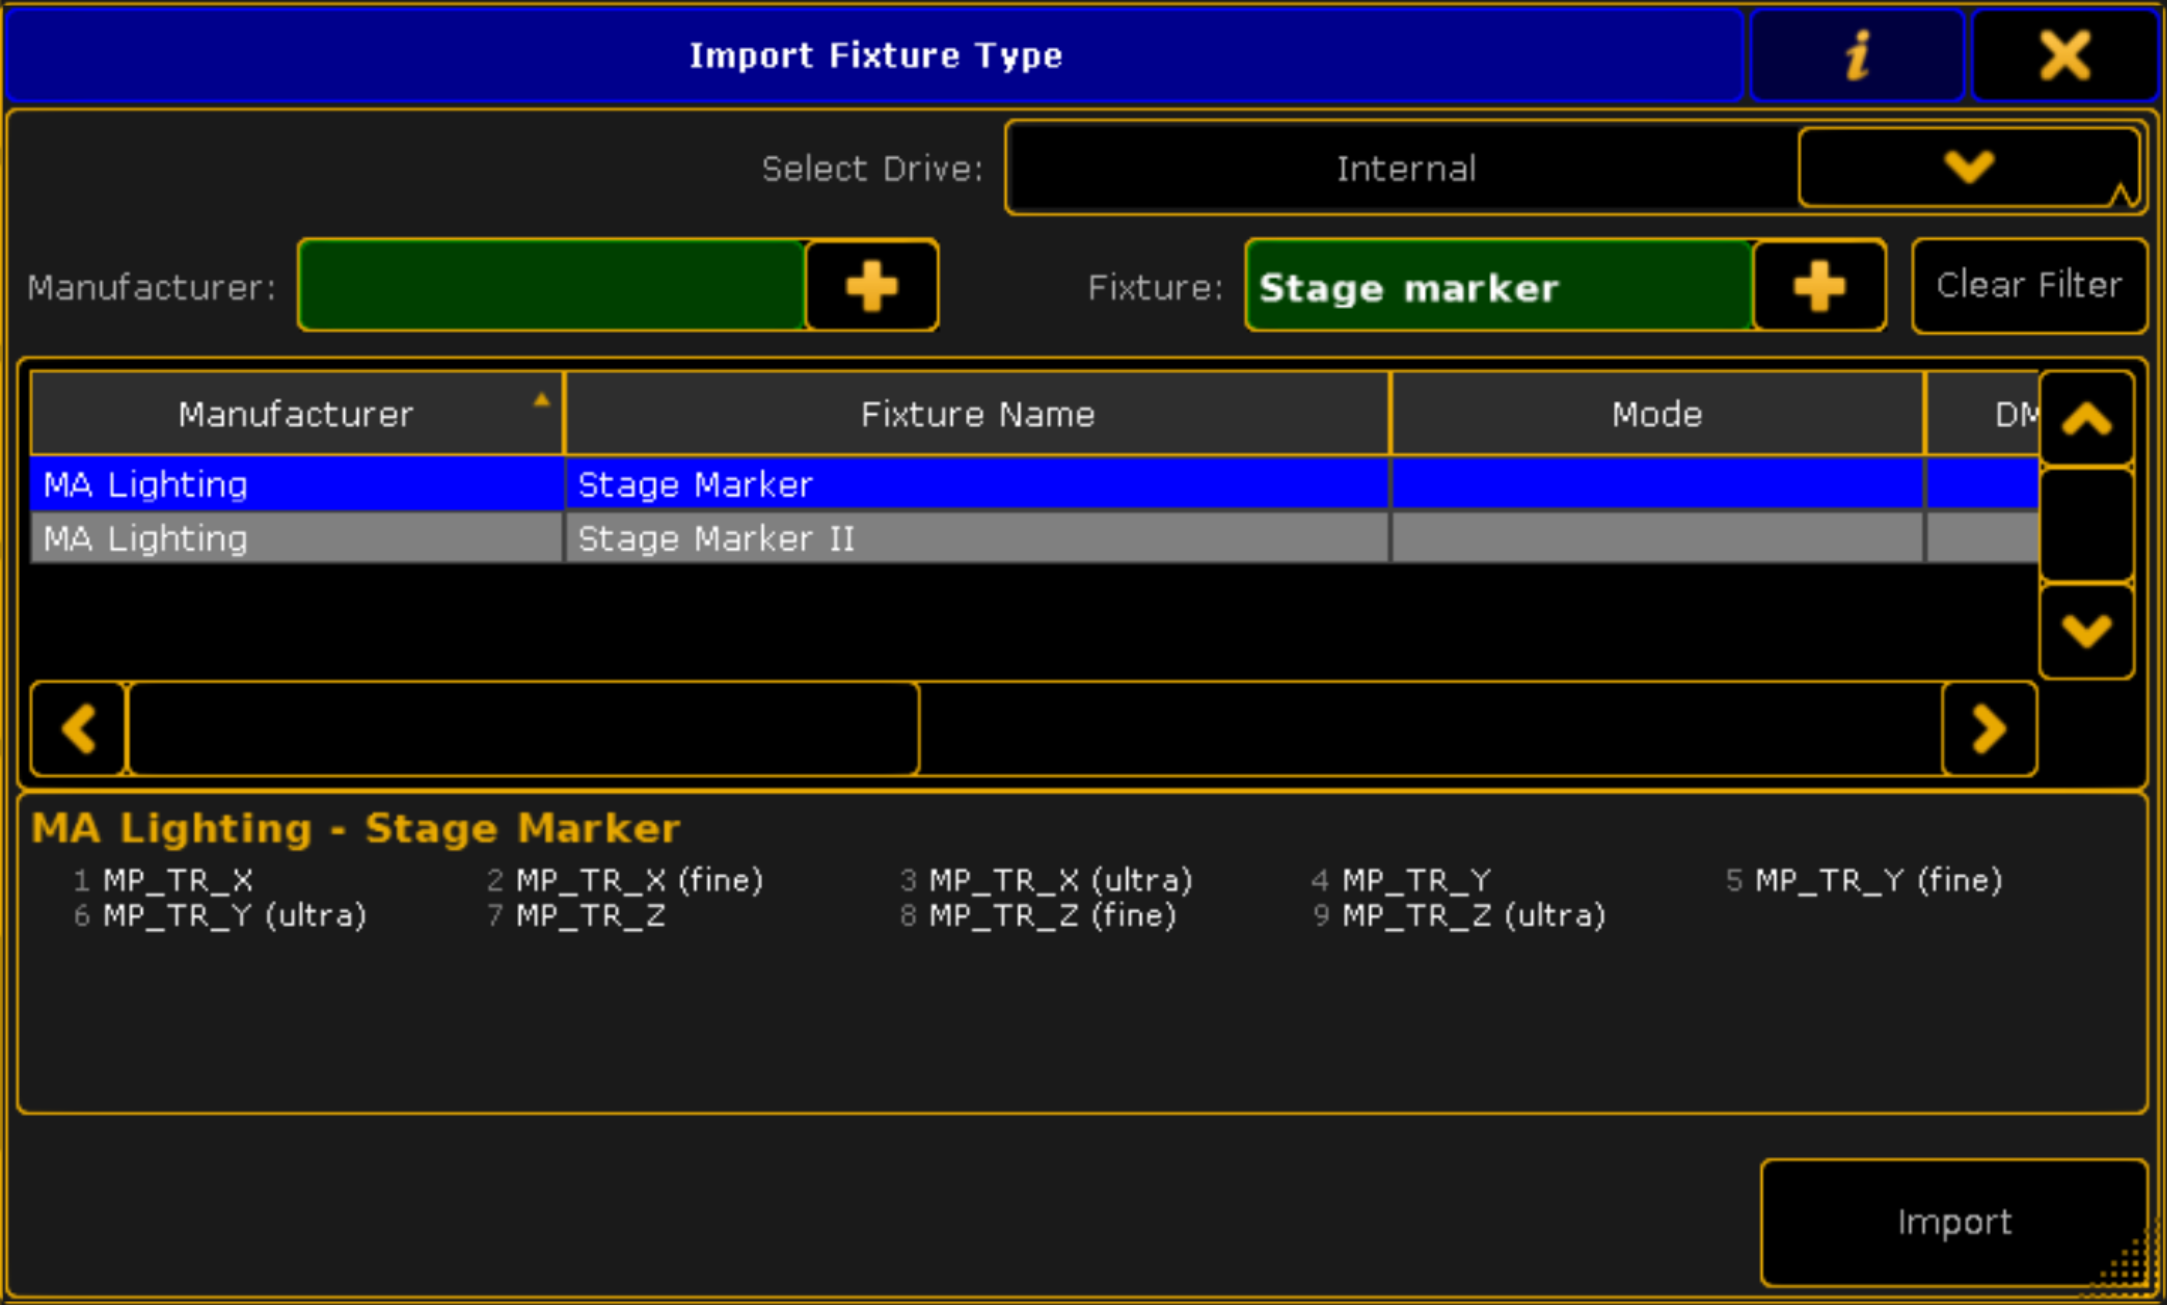
The Stage Markers need to be patched with a dmx address to work.
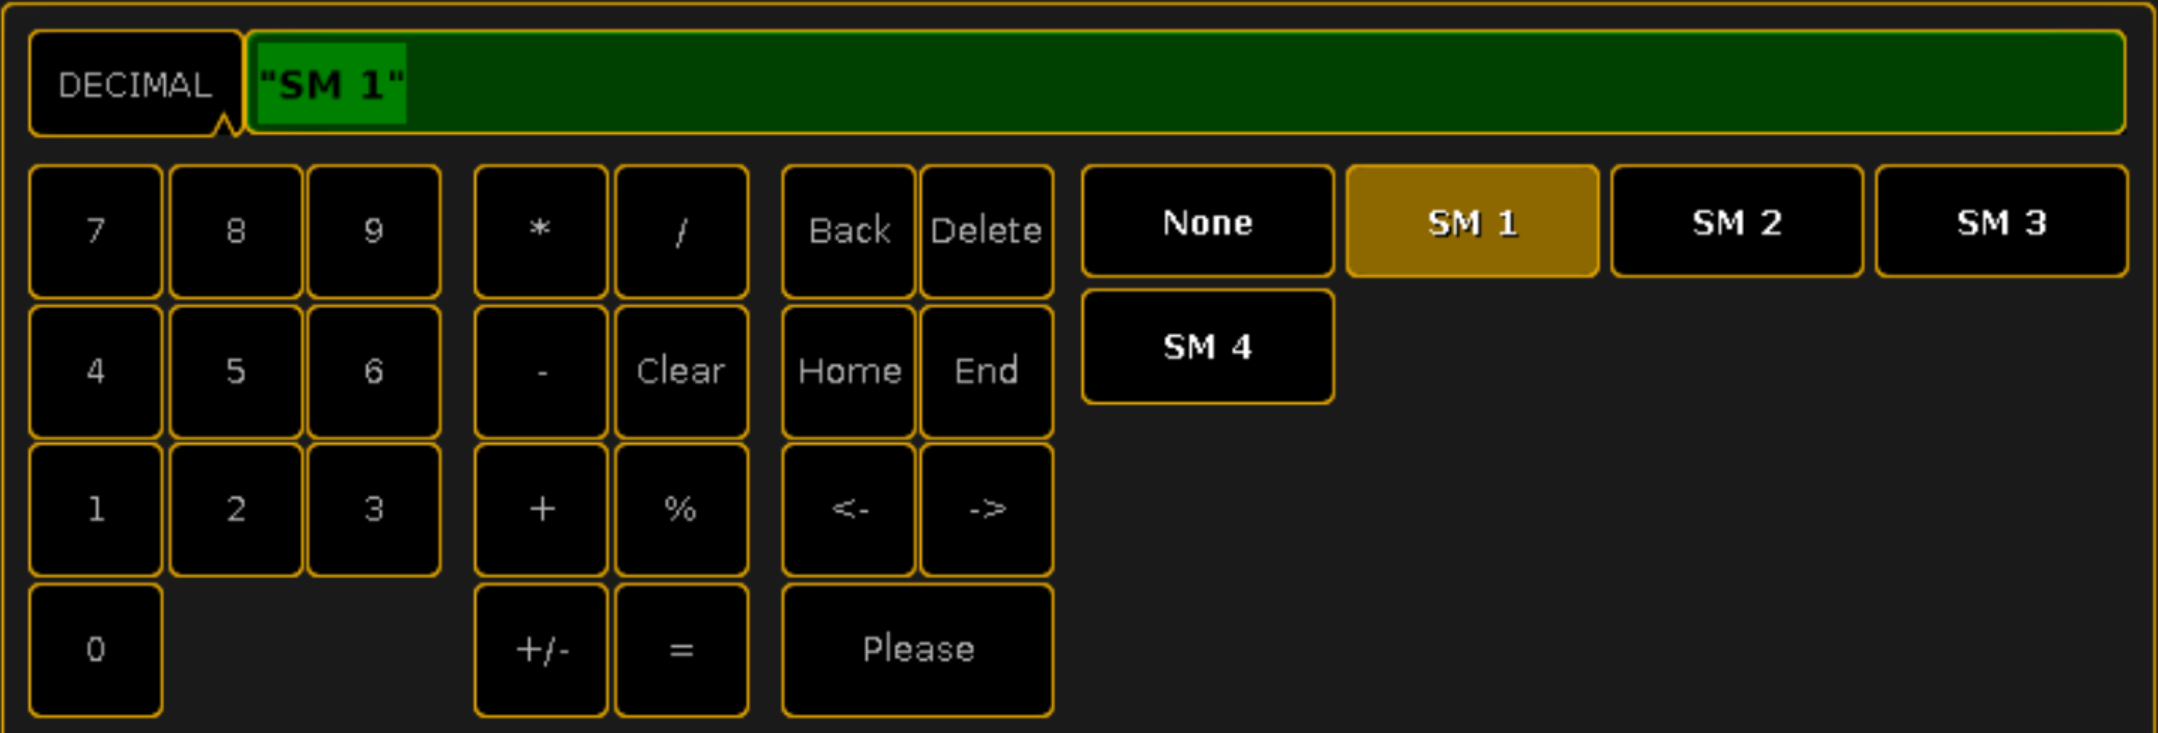
- Go to the Tracker View of the desired PSN server (see the tutorial Send Targets position to GrandMA 2) and fill in the Fixture ID column of each Target with the Stage Marker Id you want to associate with.

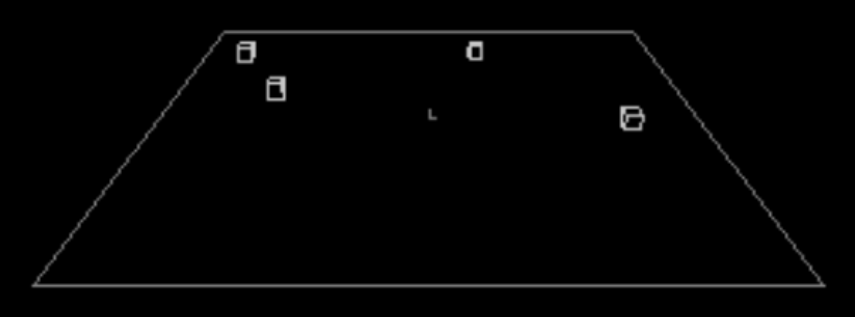
- You can now see in the Stage View the Stage Markers moving following the position of the corresponding Targets in Kratos
You can find more information about Stage Marker on the MA help page.
Patch tracking fixture and check corresponding fixture type
GrandMA 2 allows you to use any fixture you want to perform tracking with. But modifications and verifications need to be performed in the fixture type.
For each fixture you want to perform tracking with, you have in their fixture type to :
- Enable XYZ
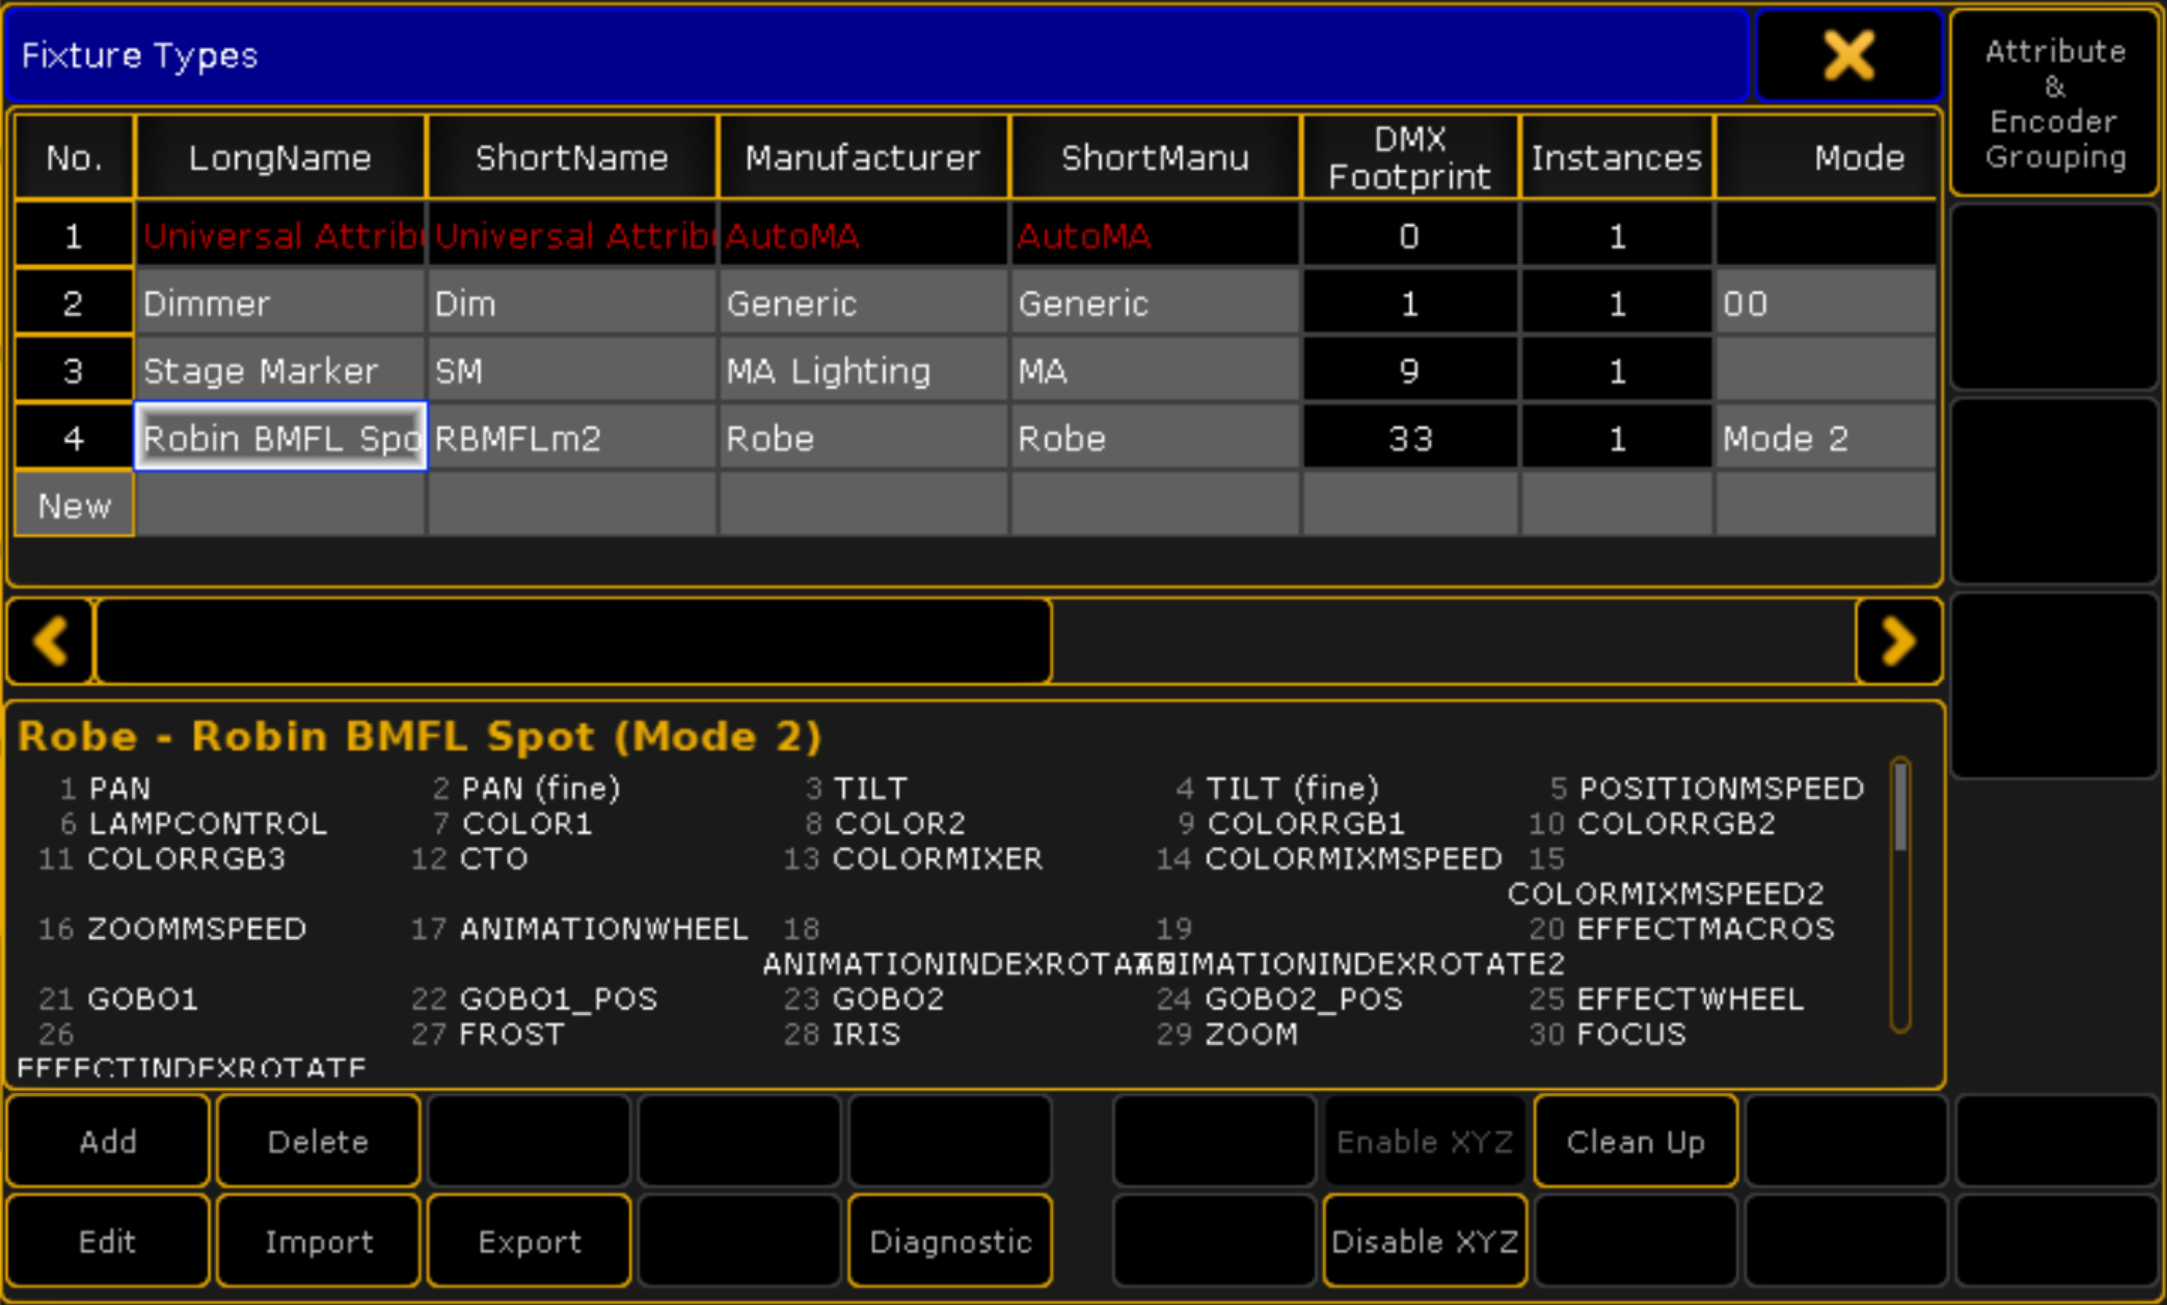
- Check that the values
From,To,From PhysandTo Physof thePanandTiltattributes are corresponding to the real values given by the fixture manufacturer. You need to change theses values if it is not the case. To check those values, you need to edit the fixture type, and then edit the Pan and Tilt rows.


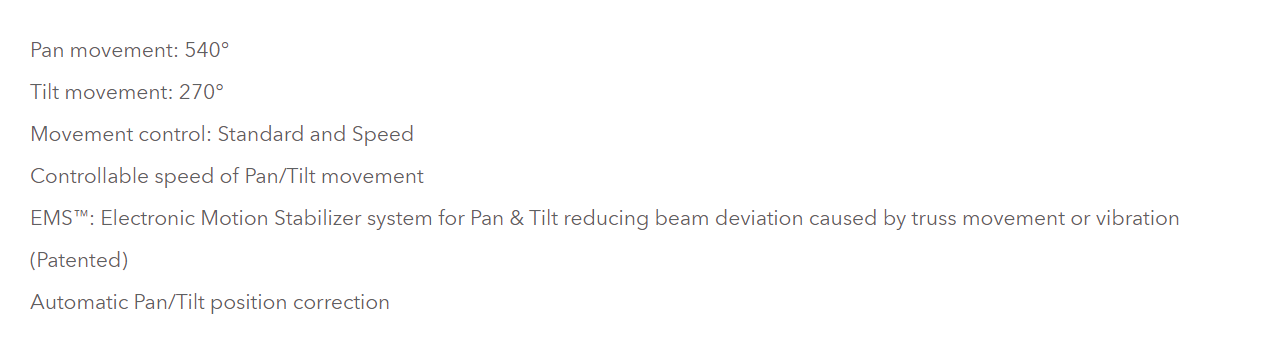
In the previous example, the Pan movement of the BMFL Spot is given at 540° by the manufacturer. 540° / 2 = 270°, the values From -270.00 To 270.00 and From Phys -270.00 To Phys 270.00 are therefore correct in this case. Same conclusions for Tilt.
This step is crucial as incorrect values that do not correspond to real life will lead to shifts in the tracking and it is important to note that many fixture types are filled with wrong values.
Calibrate fixtures position
Knowing the precise real life position of the fixtures you want to use to track people is crucial to perform good tracking. Using positions given by CAD files of the stage (like wysiwyg files) will not lead to good tracking as in real life the fixtures will always be installed in an not perfect way and have shifts in position and rotation. That is why it is important to perform a calibration of the position of each fixture you want to use for tracking. To do so, you have to use the fixture auto-calibration feature of GrandMA. To access this feature :
- Create a "Stage View" in your show (located in the "Other" tab).
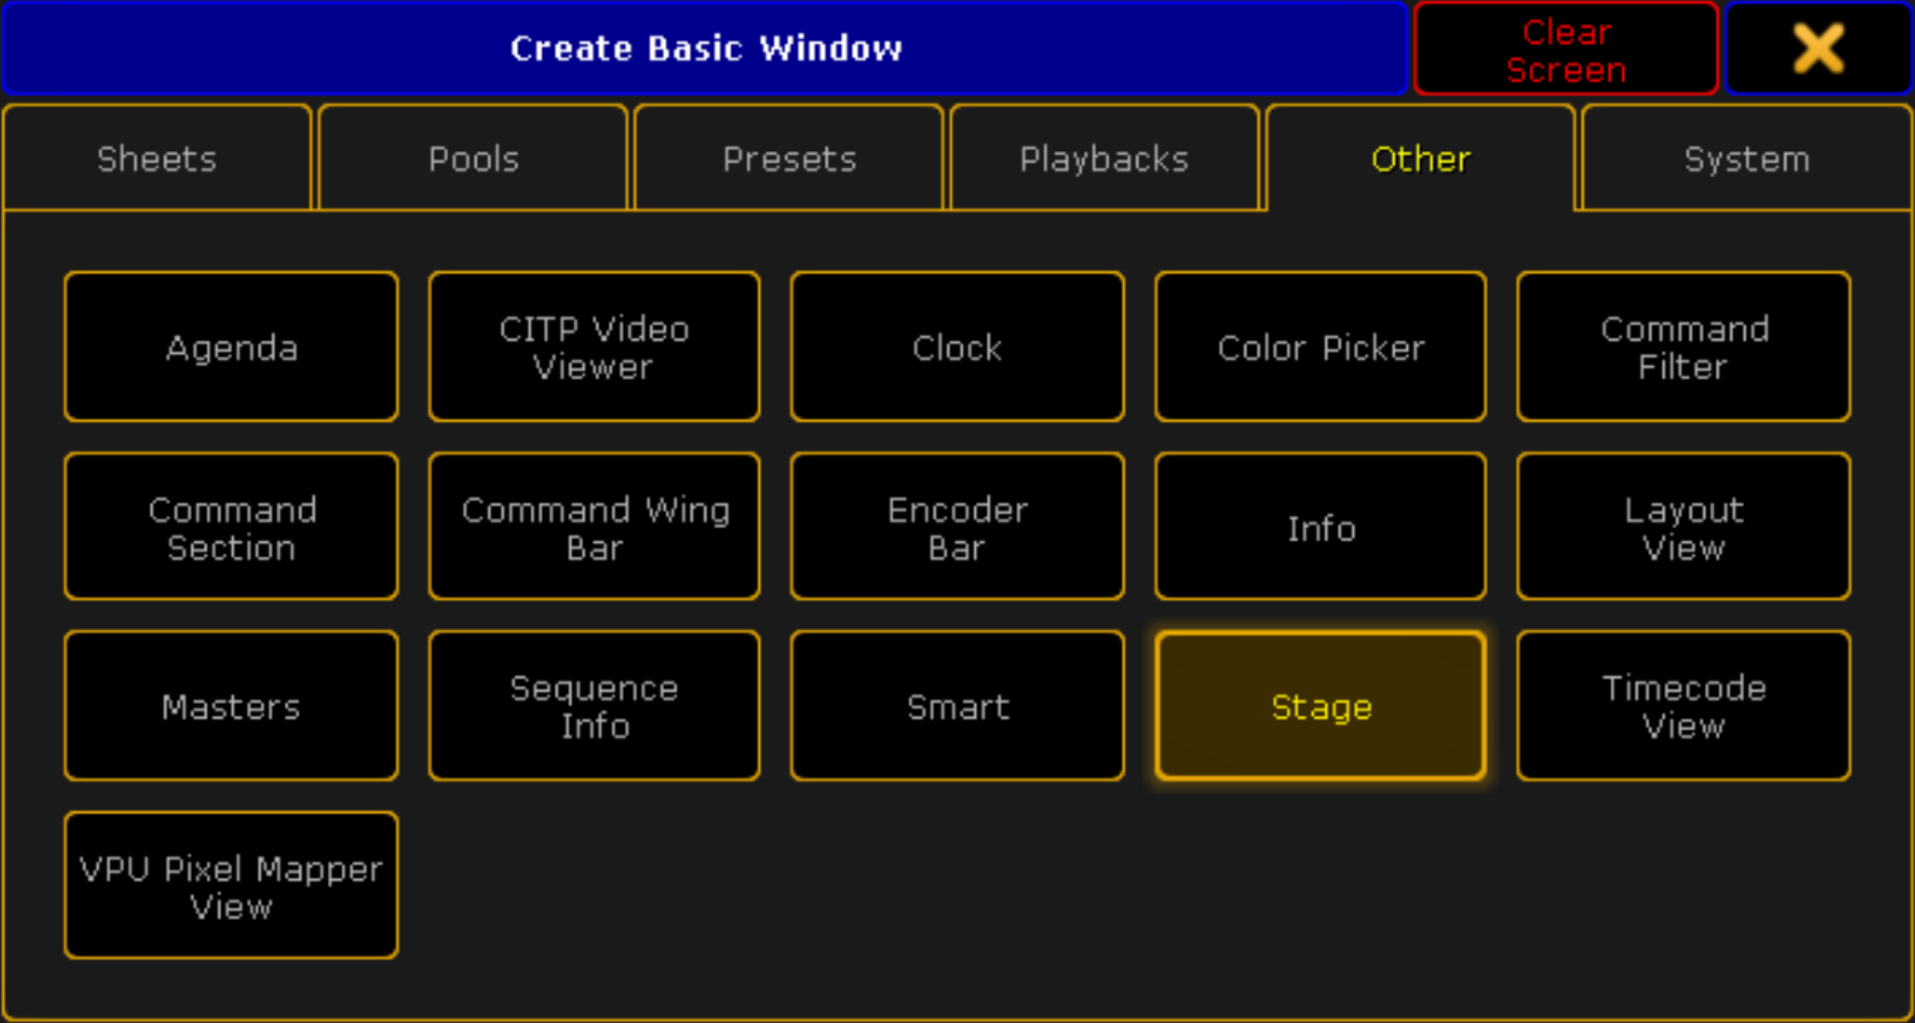
- Click on the yellow circle in the top left of the Stage View window and select "Calibrate Fixture Pos" in the "Calibration" tab.

- You are now in the auto-calibration window of GrandMA.
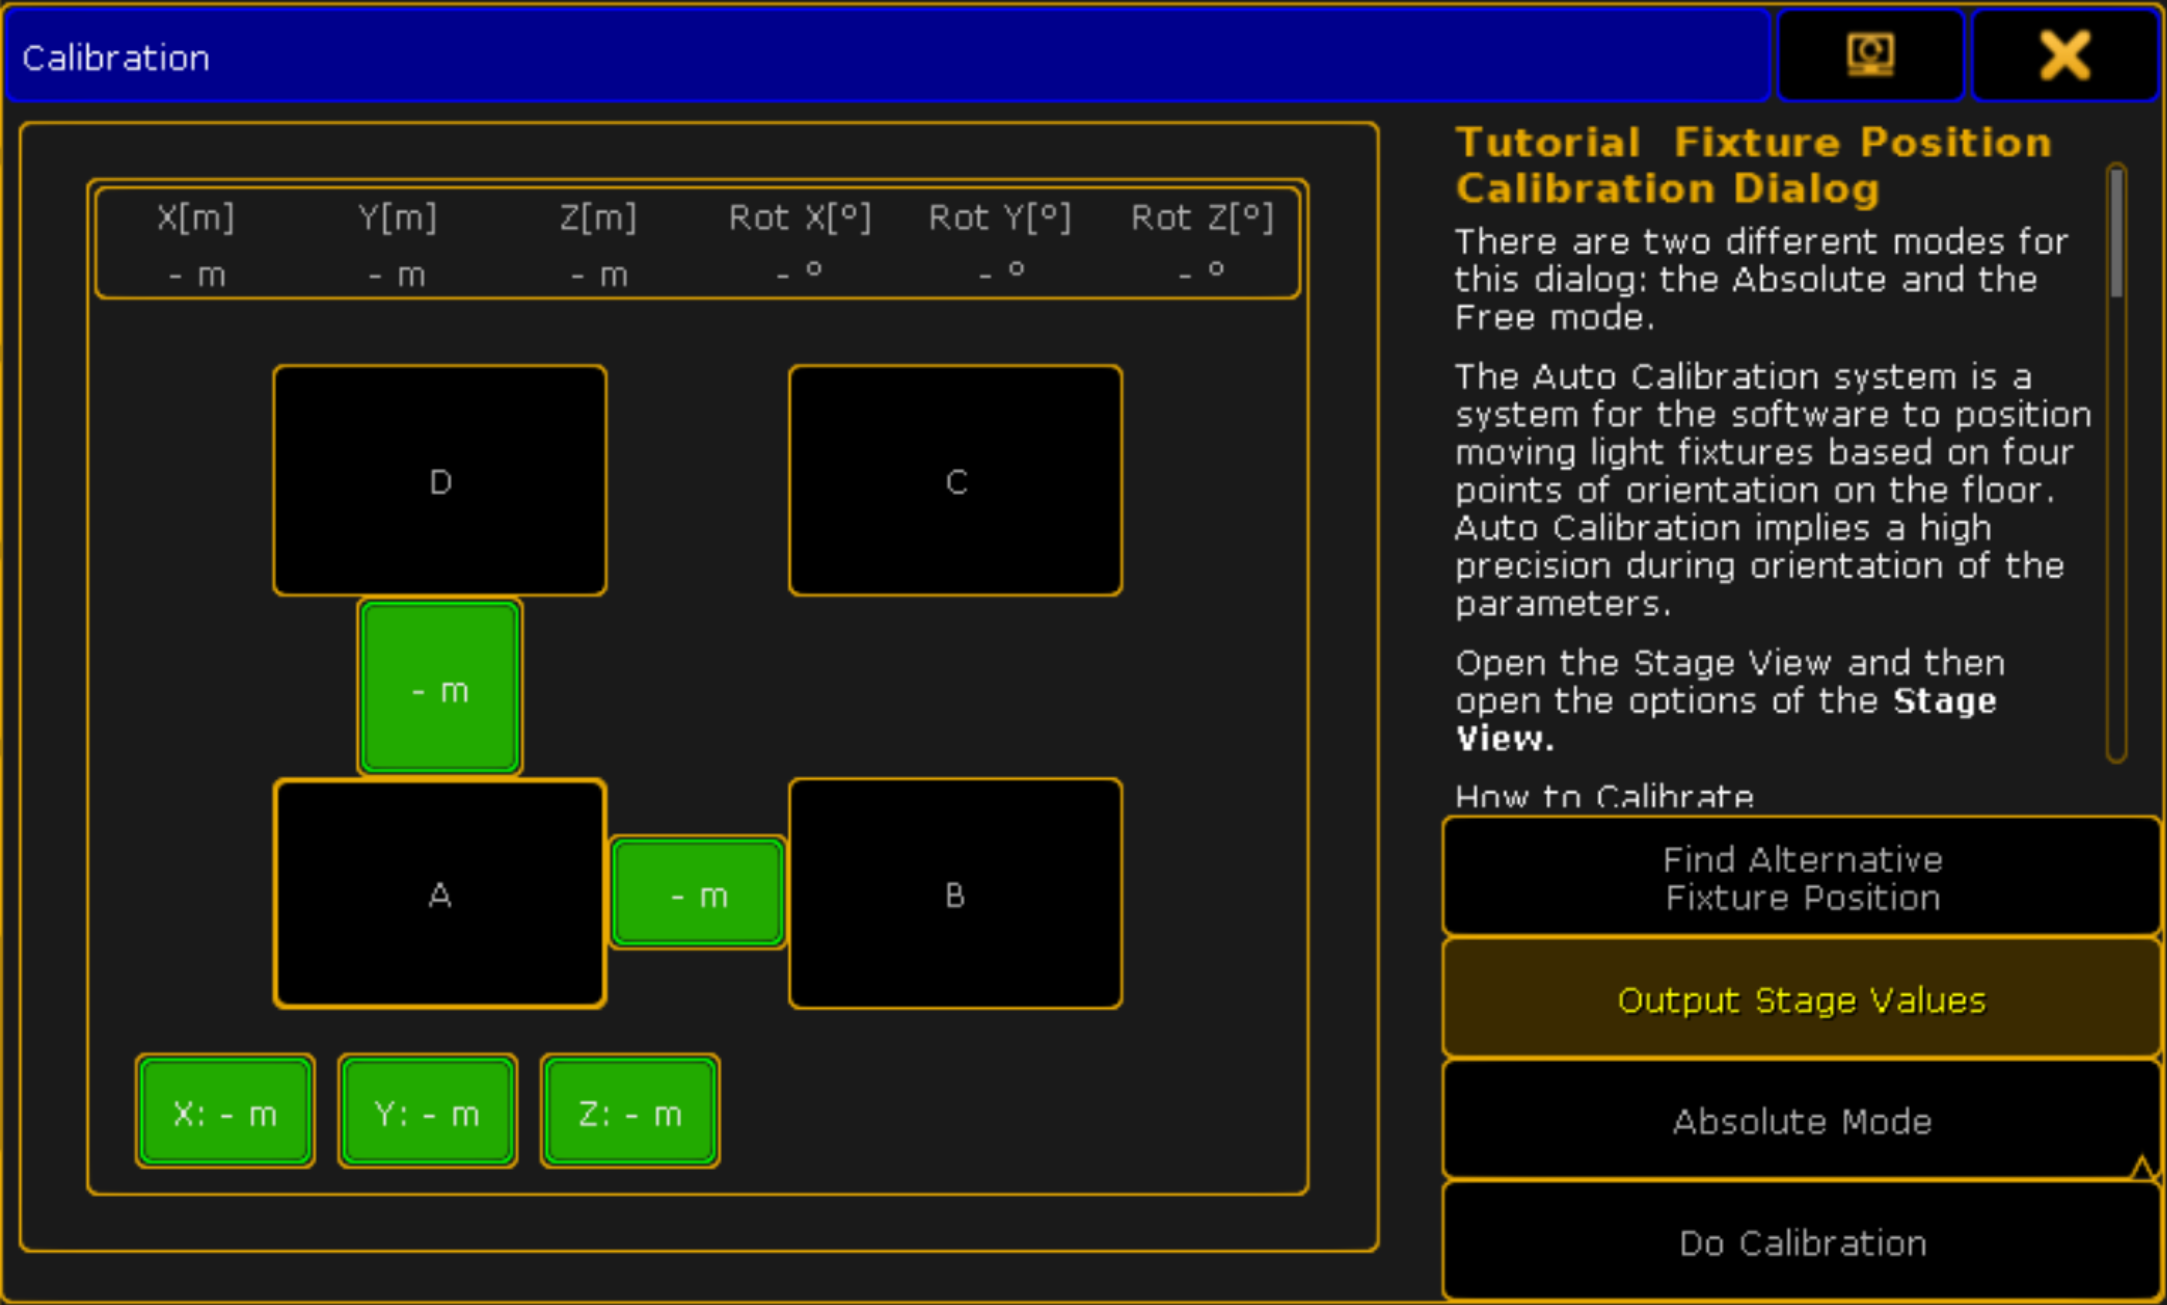
To calibrate a fixture, you have to make it point physically at the 4 corners of a rectangle of known position and dimensions and store the corresponding positions in the auto-calibration window.
You can use different rectangles for different fixtures if you can’t physically point them at the same 4 points. But it is preferable and quicker to use the same rectangle as much as possible.
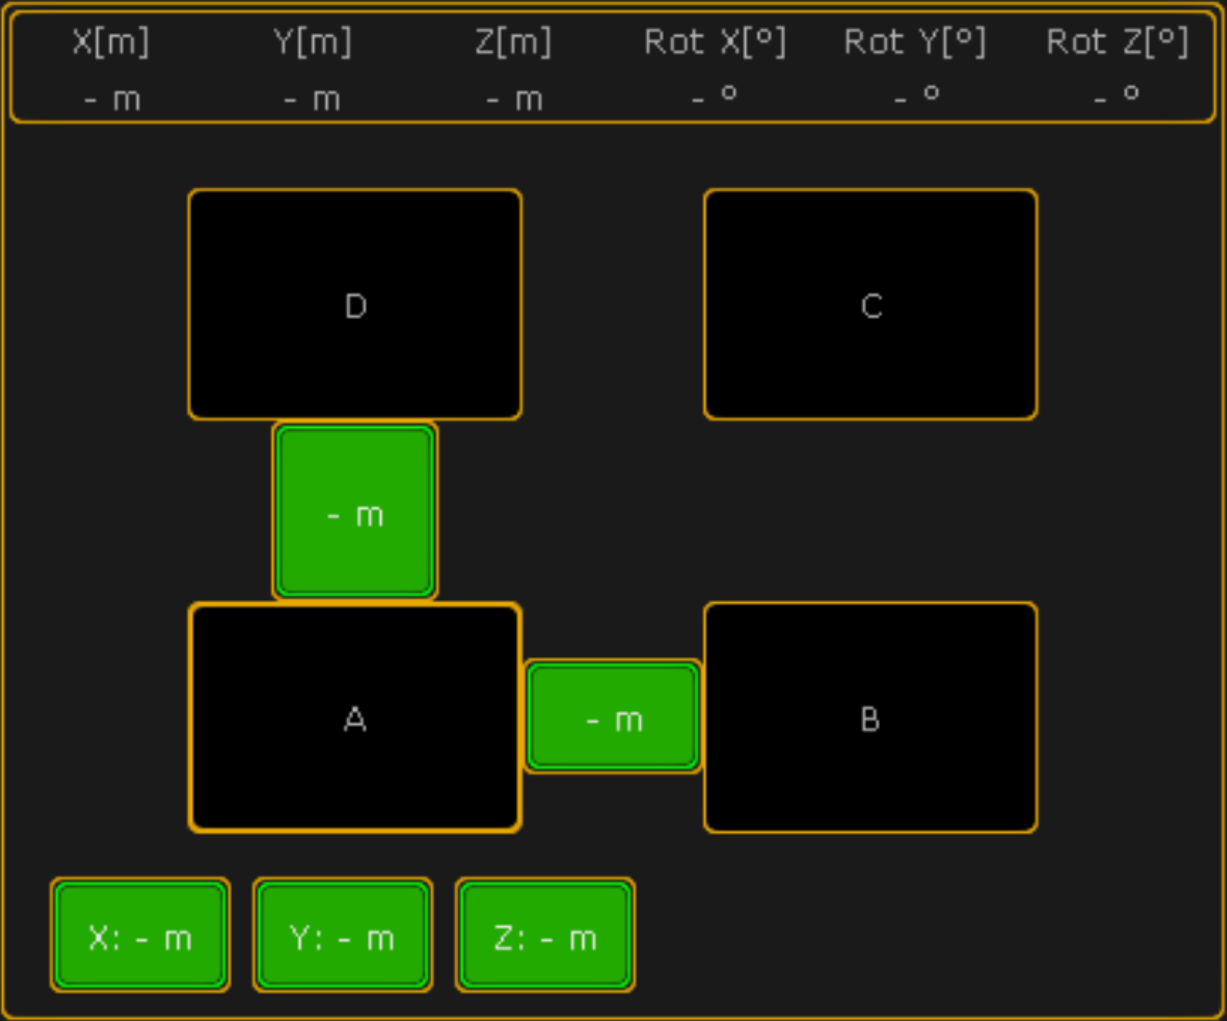
To perform the calibration, you will need to physically mark the corners of a rectangle on your real stage - point A, B, C and D. And you need to tell the software where your rectangle is. This can be done in two modes :
- If your rectangle is at a level plane of your stage, you can use the Absolute mode. In this mode you define the X, Y and Z position of corner A and then you specify the distance from corner A to corner B and corner D. This mode is the standard mode and is used in the majority of the cases.
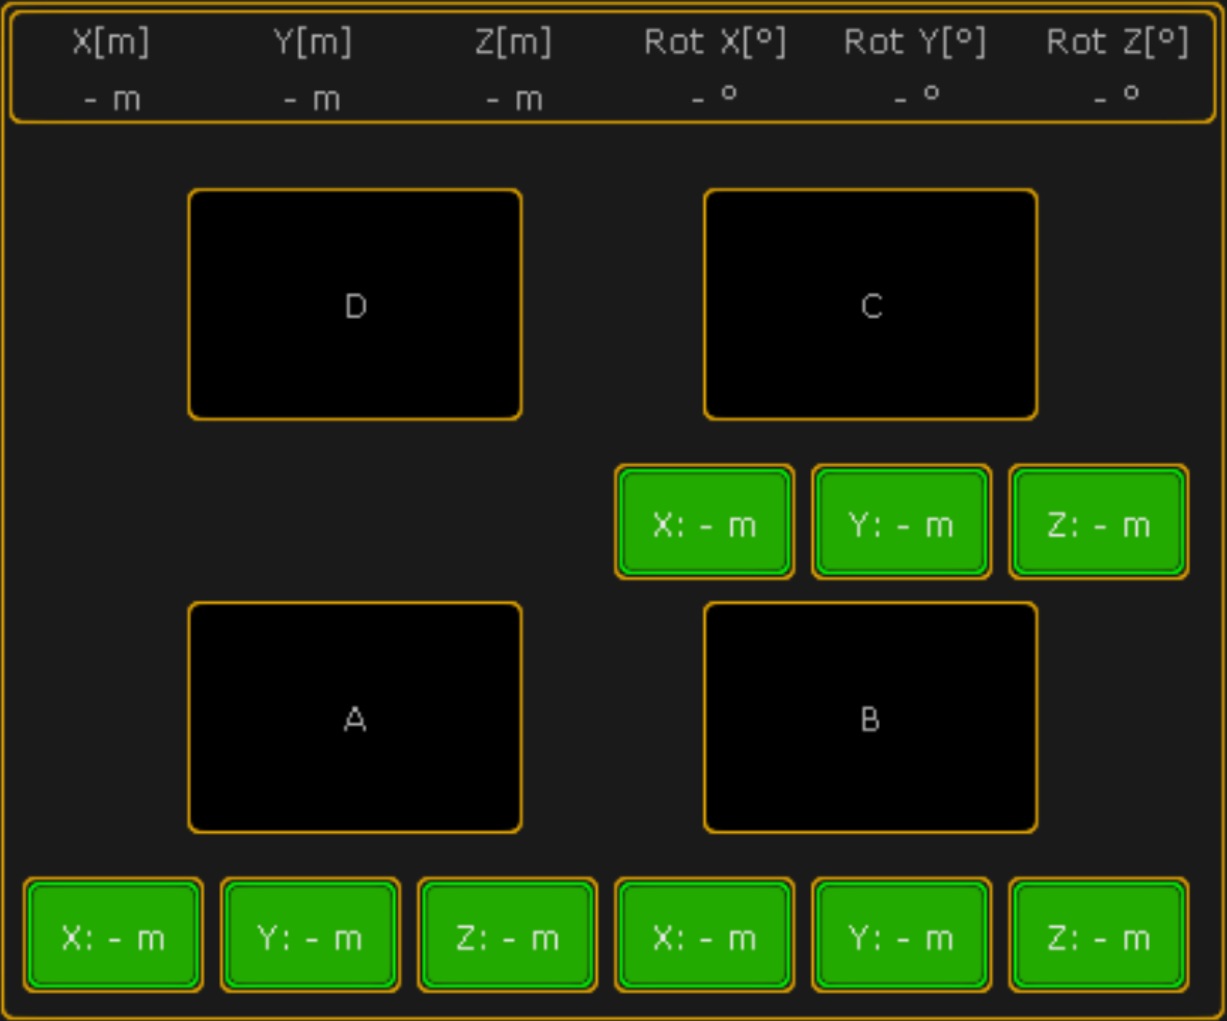
- If the rectangle needs to be on a sloping part of your stage then you need to use the Free mode. In this mode you define the X, Y and Z position of three corners (A, B and C). This mode is interesting if you can’t calibrate fixtures by drawing a rectangle on the floor so you can draw the rectangle on a wall for example.
The mode used can be changed using the third button at the right of the auto-calibration window.
To calibrate a fixture, the process is the following
- Create a rectangle on the floor of the stage
- Create 4 Pan/Tilt position presets for the 4 corners A, B, C and D for your rectangle
- Point the fixture at the first point (A) and store it’s position to the corresponding position preset. Try to have the smallest beam size possible to have a better precision
- Do the same for the 3 other points
- Repeat the steps 3 and 4 for all the fixtures using the same calibration rectangle
- When the previous operation is done, select all the fixtures using the same calibration rectangle and go in the auto-calibration window
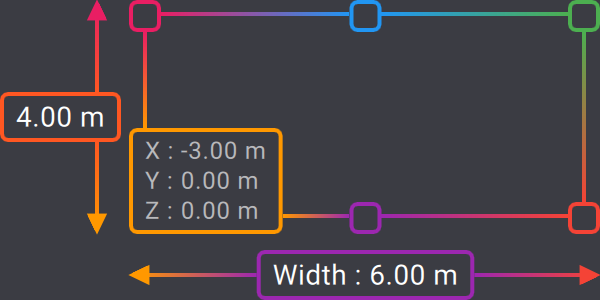
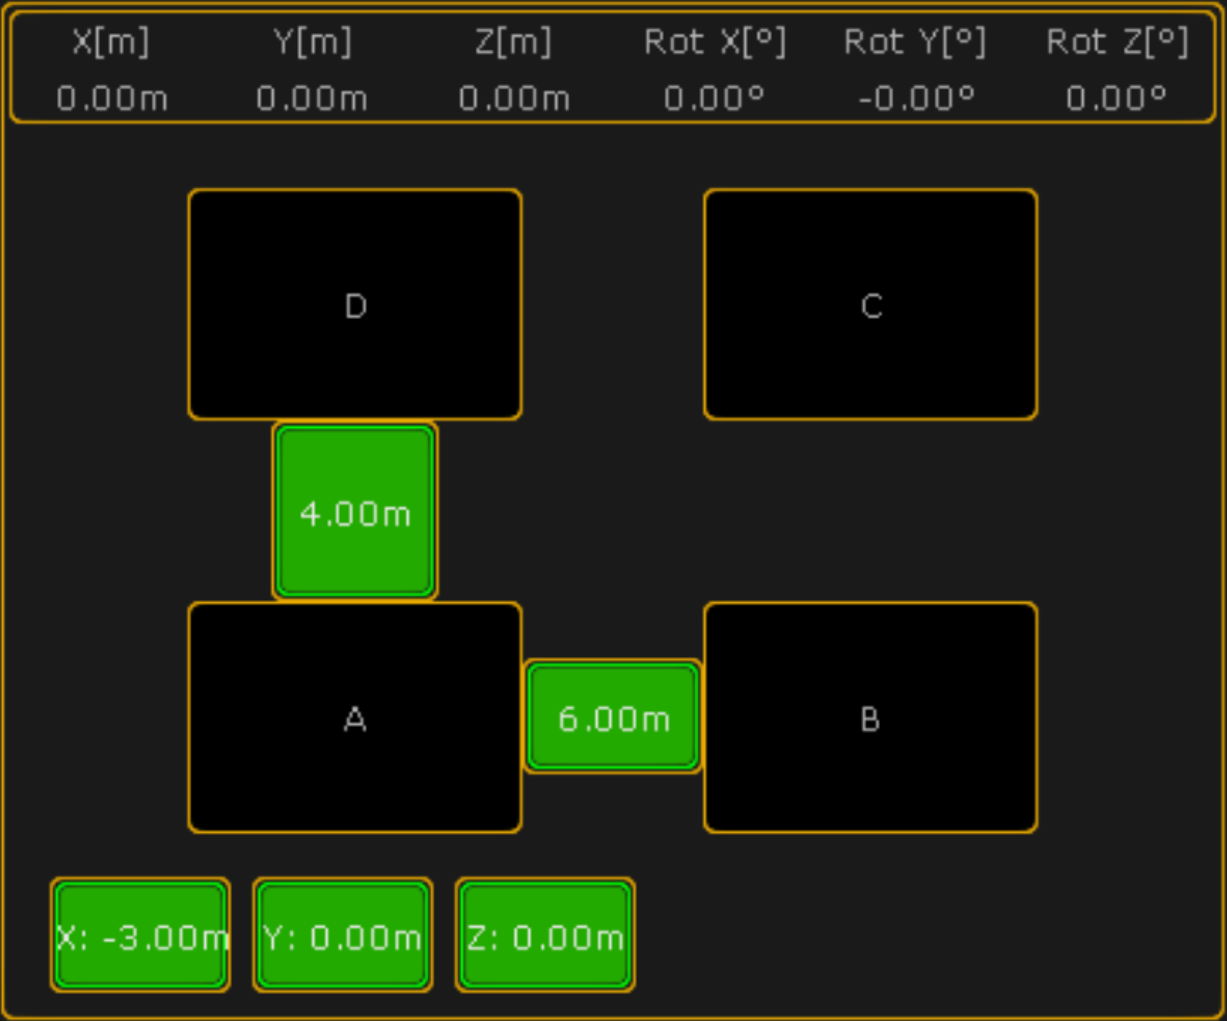
- Input the dimension and position of the calibration rectangle (see...)
- Call the Pan/Tilt preset A in your programmer (with all fixtures selected) and press the Store key and the A button on the calibration pop-up.
- Repeat the procedure for corner B, C and D; pressing the respective buttons in the view.
- Now select all fixtures and tap the Do Calibration button in the window
- Check that the position of the fixtures in the Stage View are correlated with the reality
- If a fixture is placed in the wrong place in the Stage View (it is placed under the stage for example), select it and press the “Find Alternative Fixture Position” button in the auto-calibration window
- If you have other fixtures using a different calibration rectangle, repeat the operation 1 to 12.
Precautions to take when calibration fixtures
- The coordinates used for the calibration rectangle must be the same as the coordinates used in Kratos
- Be careful that the Pan/Tilt channels have the right movement in your Stage View and the real world (invert them if necessary)
- Be careful to not flip the fixtures when calibrating them
On a standard stage setup, we recommend using the same rectangle used in the calibration process of the Kapta to calibrate the fixtures. This allows you, if you open the calibration window of Kratos, to have a clear top view of the stage and calibrate the fixtures without having to look at the stage directly : just point the beam at the 4 crosses making the corners of the calibration rectangle. Be careful that the origin of the calibration rectangles are not the same in Kratos and in GrandMA : Kratos uses the middle of the X side of the rectangle as the origin whereas GranMA uses the A point. If you use the same rectangle, you can hover on the orange corner in the calibration window of Kratos to tell the coordinates to use for the A point in GrandMA.
You can find more information about fixture auto-calibration on the MA help page.
Create position presets
Now that everything is setup, the only thing left is to create position presets for the fixtures corresponding to the Stage Markers. To make a fixture point to a Stage Marker :
- Select the fixtures, go to Stage B in the preset type Position and select the Stage Marker you want the fixture to point to.

- Go to Stage A and make sure that the values for X, Y and Z are set to 0.0. Theses values are offsets between the position of the Stage Marker and where the fixture will point. As Kratos send position of the center of mass of people, you might need to add a bit of Z offset in function of what type of tracking you want to perform.

- You can then save this to a position preset to call it anytime you want during your show.
Points of attention
Our experience with many fixtures has told us that some of them are better than other when it comes to followspot application. This is due to the fact that some manufacturer includes special modes in the fixture that derestrict the movements of the Pan and Tilt motors, making them more responsive. Other in the other hand implement a lot of smoothing in the movements that can't be disabled, making them always point behind the person you want to track, even with added prediction on Kratos side. That is why we recommend to perform tests with the fixtures you want to use before using them in a show, and to look at the different modes the fixture can offer.